Guide: Replacing Wild Life assets via Unreal Engine 5
Prerequisites: This guide assumes that you have installed a version of Unreal Engine that corresponds to the version used by your Wild Life build. For example, if your Wild Life build uses Unreal Engine 5.3, then you should have Unreal Engine 5.3.X installed (any value of X should be fine). The guide also assumes that you have basic texture modding knowledge, e.g. as contained in the old texture replacement guide.
This guide shows how to use Unreal Engine 5 to create a texture replacement mod for Wild Life. For the sake of demonstration, I will walk through the process of replacing the Witch outfit's texture with a custom .png file. Using FModel I have determined that the Witch outfit's texture is located at the following path:
WildLifeC/Content/Textures/Characters/Costumes/T_clothWitch_BC.uassetThe replacement involves 3 overall steps:
- Create a blank project in Unreal Engine 5.
- Recreate the directory structure for the texture and import our custom .png file.
- Export a .pak file that can be copied into our Wild Life build's Paks directory.
Step 1: Create blank project
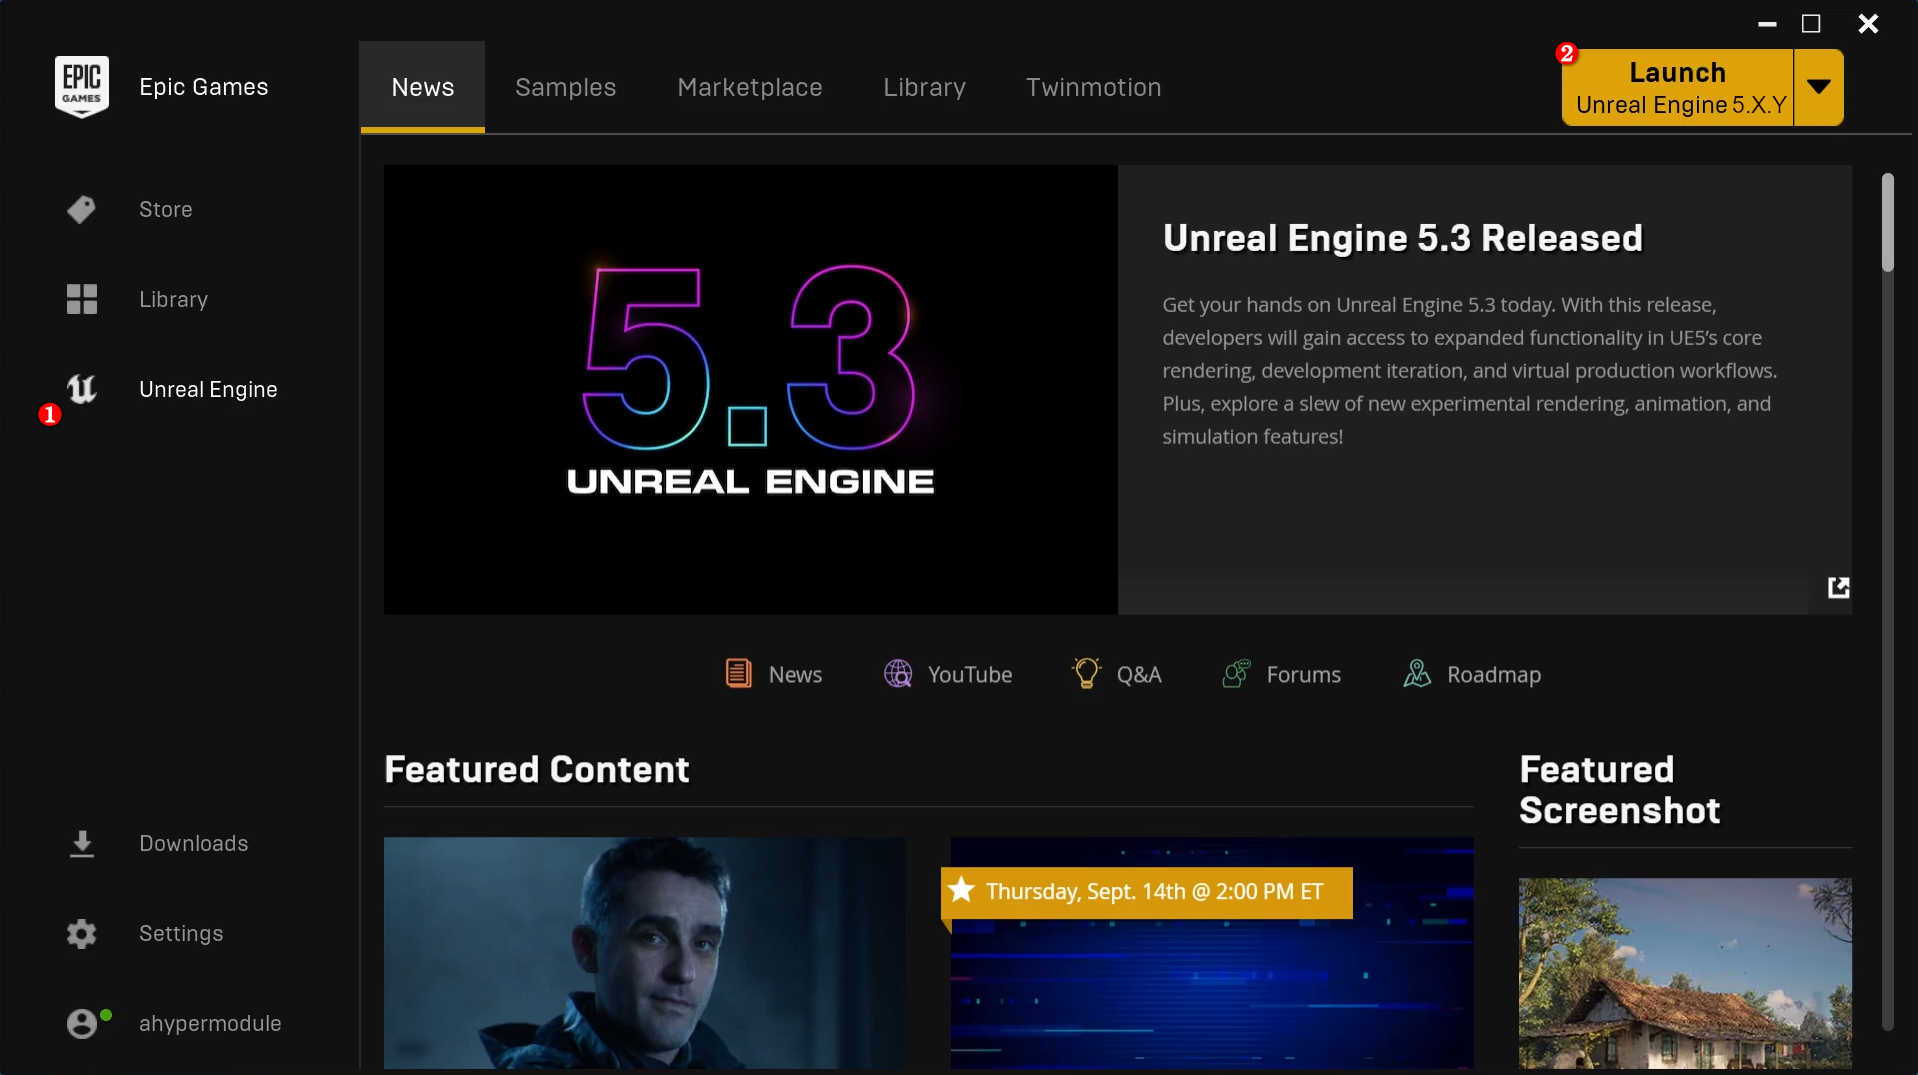
Start the version of Unreal Engine that corresponds to the version used by your Wild Life build:
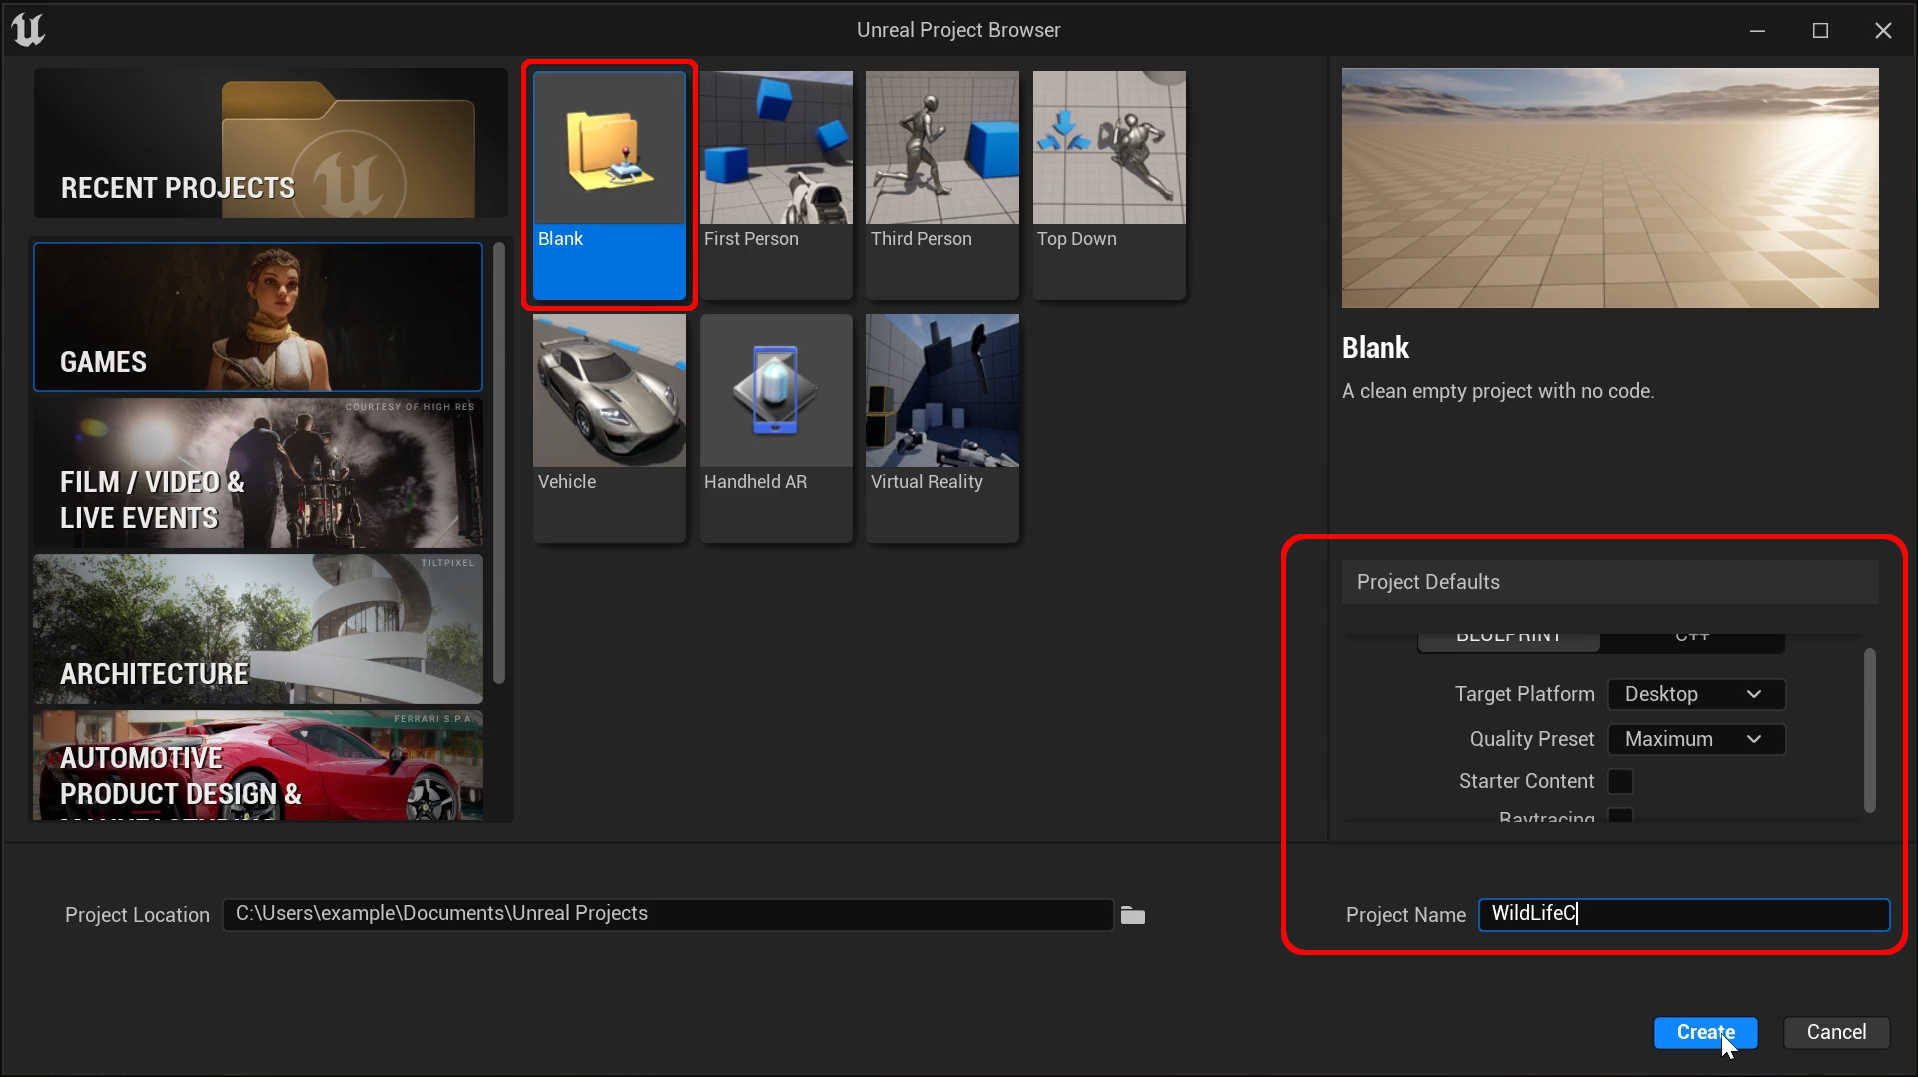
As the image below shows, the project browser should appear. Use it to create a blank game named WildLifeC with no starter content (and using Blueprint).
Step 2: Create directory structure and import replacement image
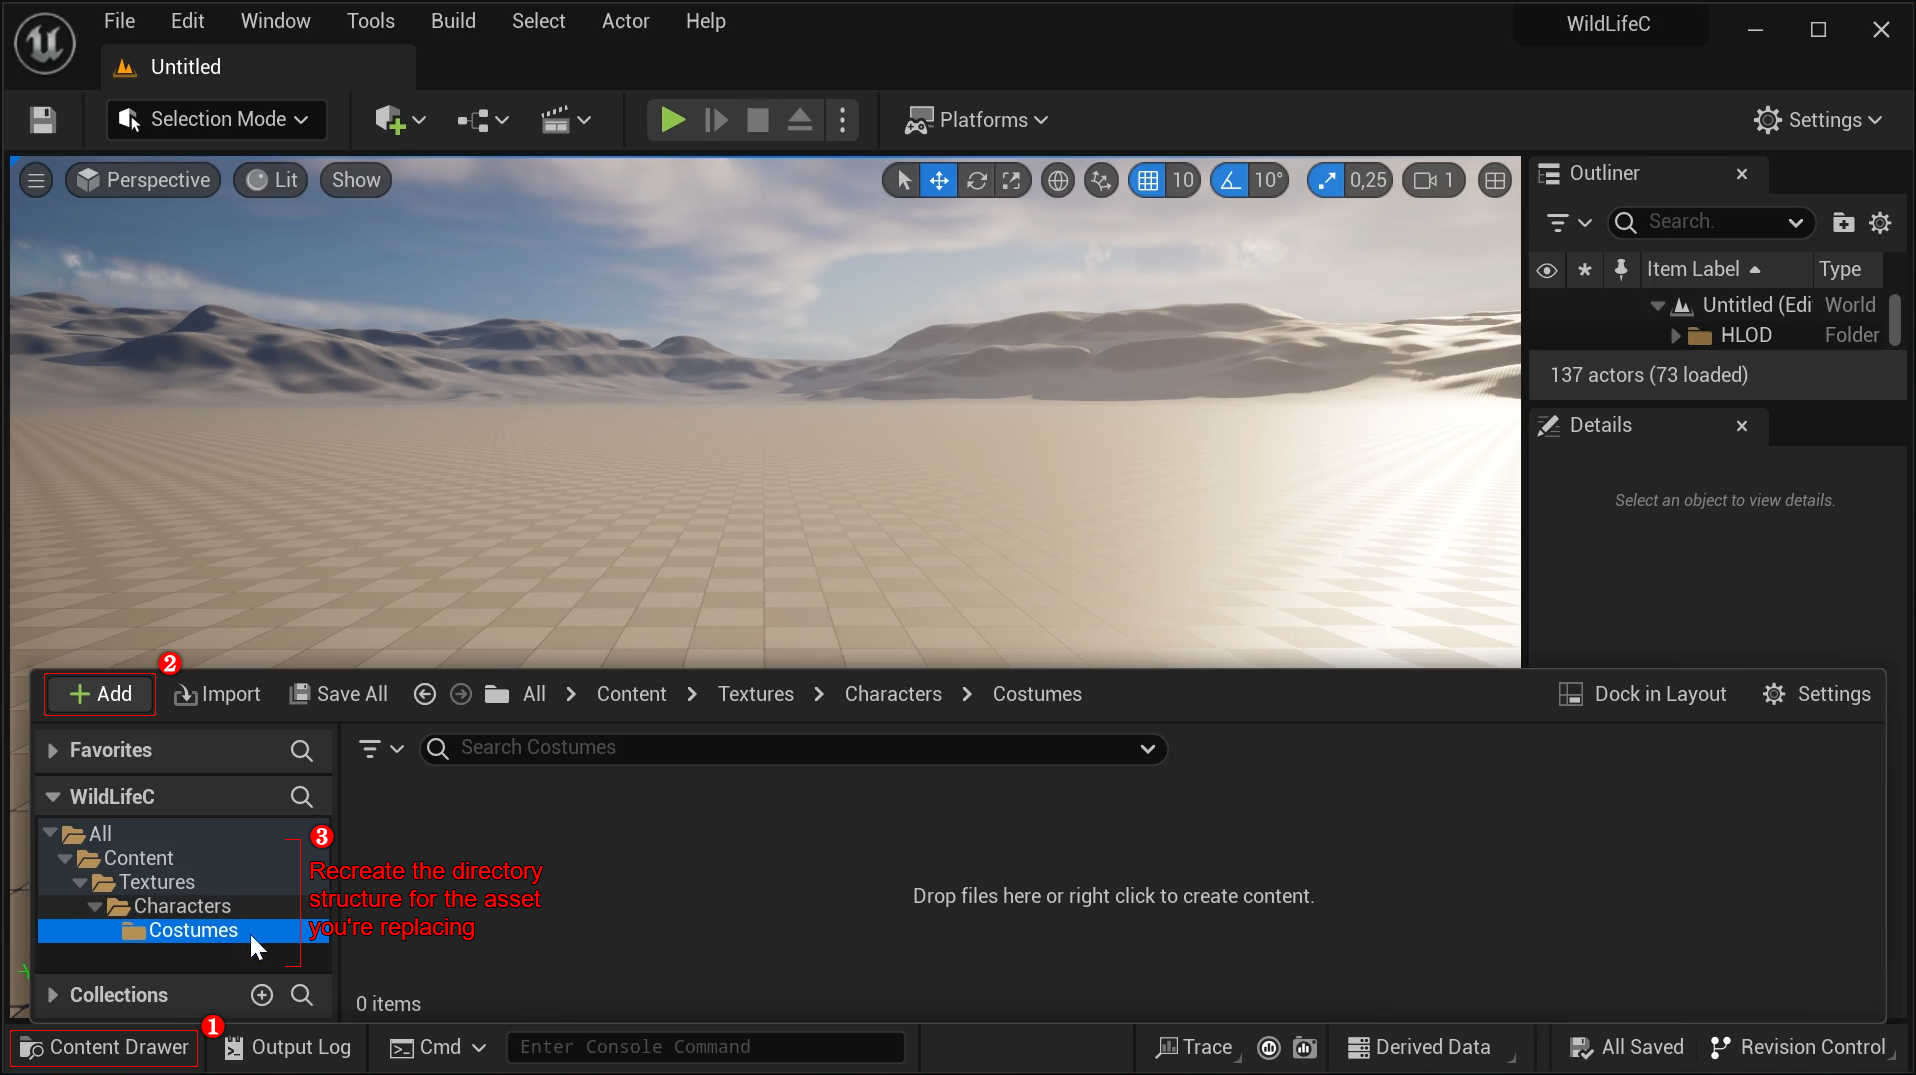
Click the Content Drawer (❶) and use the Add → New Folder (❷) to recreate the directory structure for the asset that we're replacing (❸):
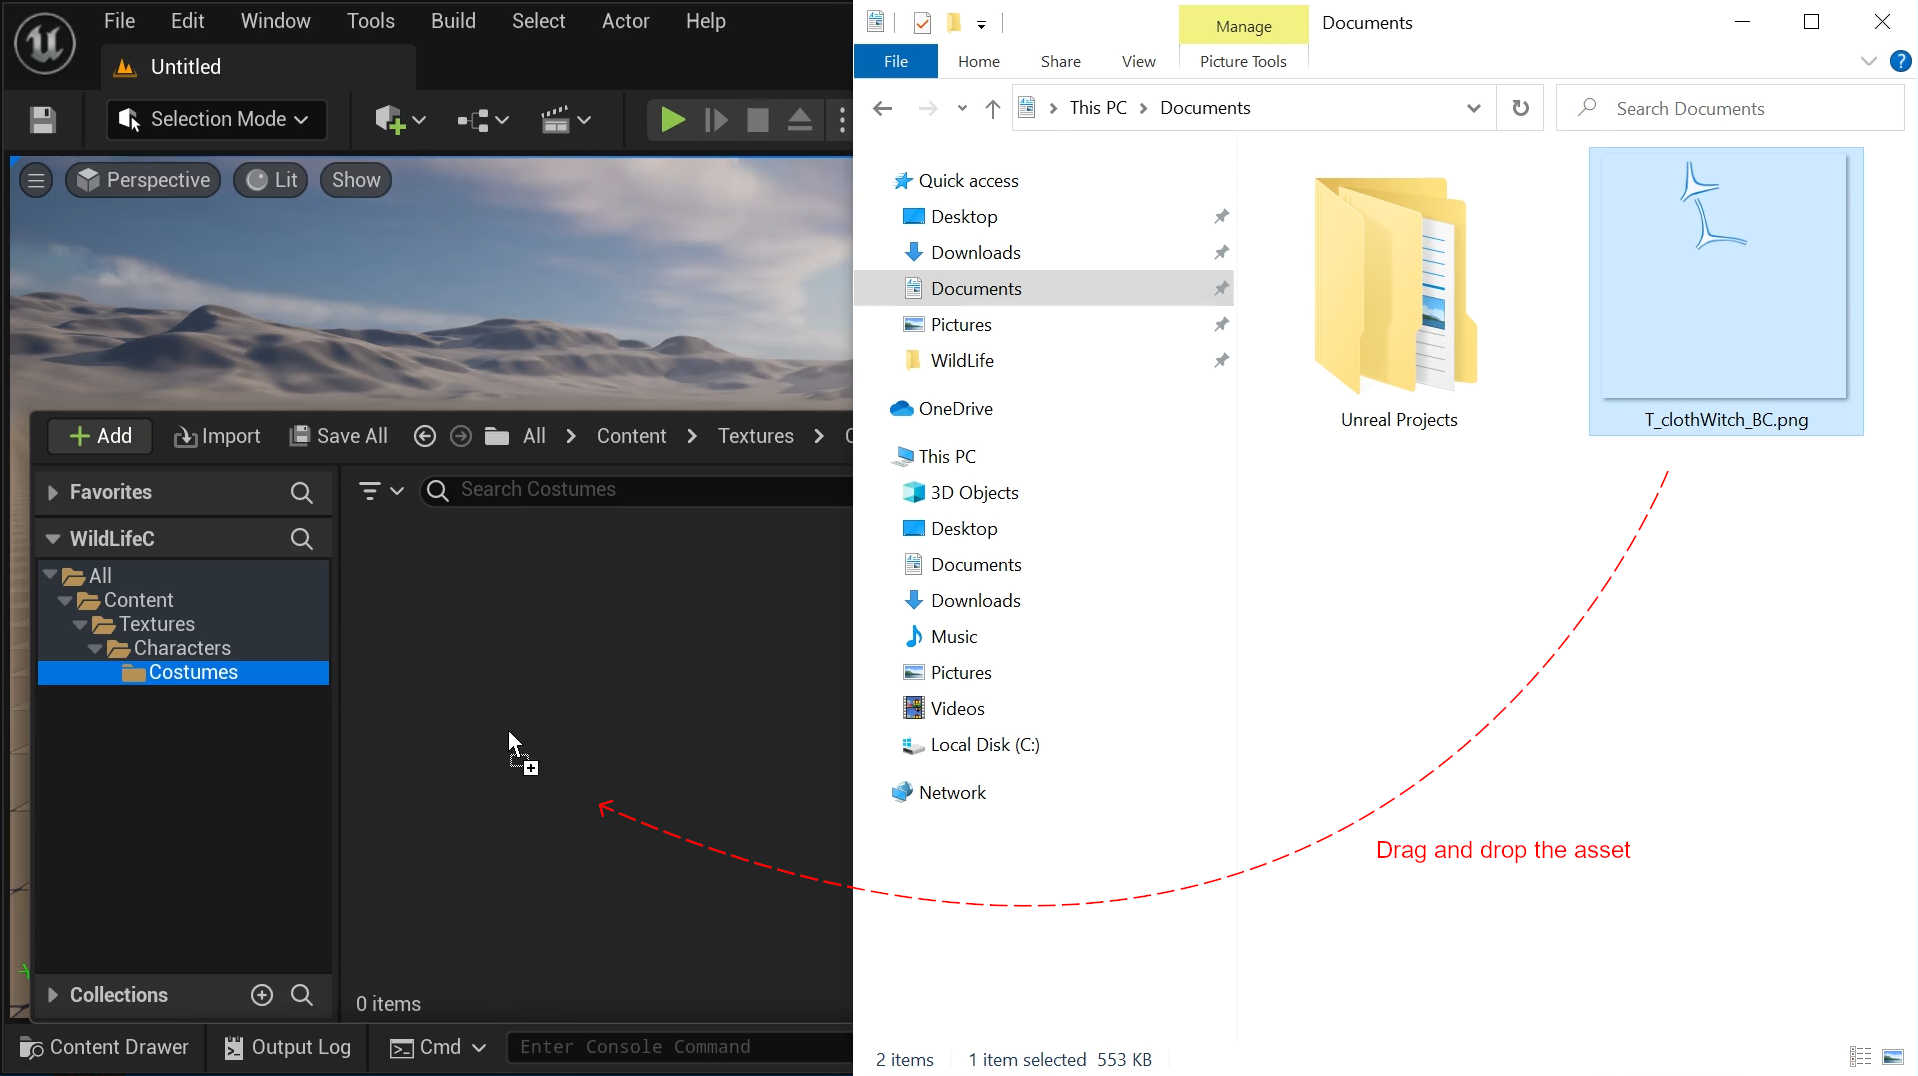
Then take your custom image (it should be named the same as the asset you're replacing) and drag it into the innermost folder that you've created:
Step 3: Create .pak file
If we build the project now, we'll create one big .pak file (~ 200 MB) containing both our custom image as well as a lot of engine files. We don't want that. Instead we want a .pak that contains only our custom image. So we need to tell Unreal Engine to create a separate .pak for it. Here's how we can do that:
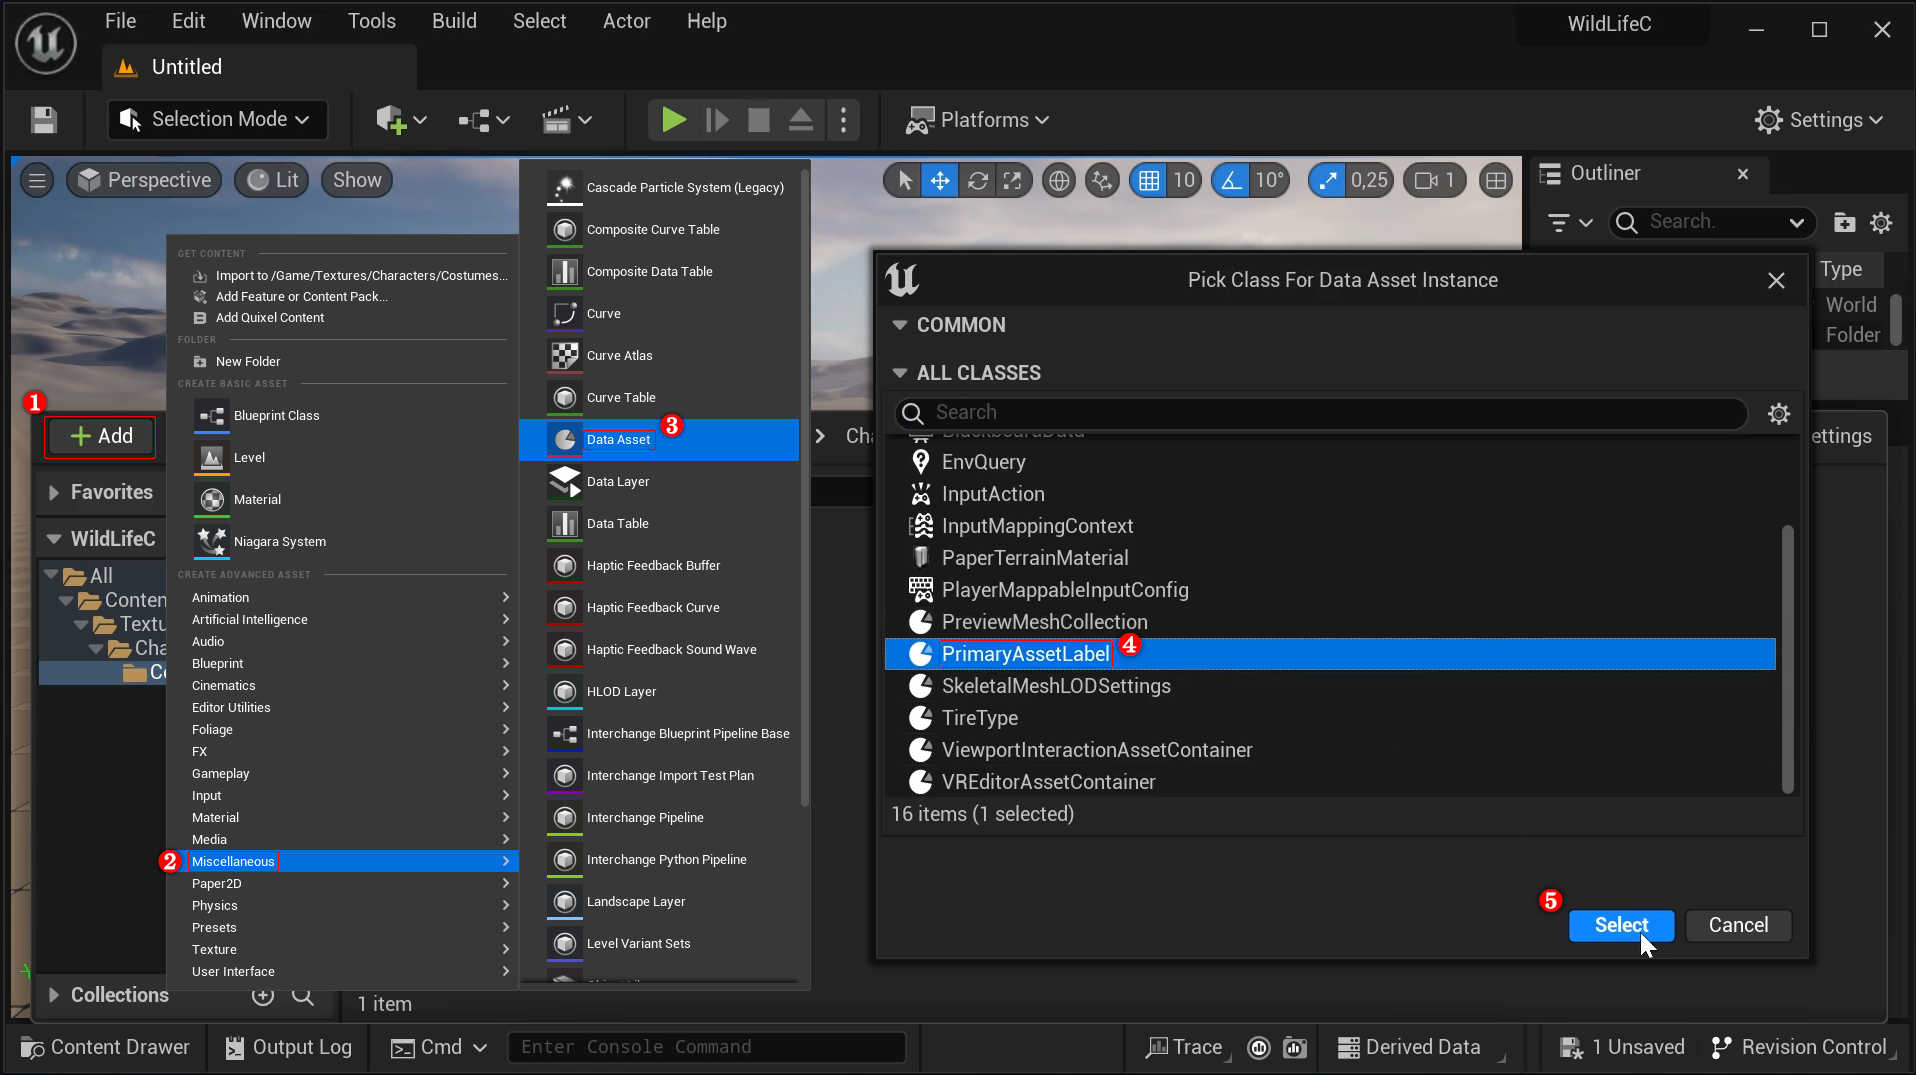
Click Add → Miscellaneous → Data Asset and select PrimaryAssetLabel:
Give the data asset some name (❶), e.g. Label_Mod, then double-click on it and adjust its settings as shown below (❷) and click save (❸):

For reference, the settings should be as follows:
- Priority: 1
- Chunk ID: 111
- Cook Rule: Always Cook
- Label Assets in My Directory: ✅
(This will tell the editor to put the files in the data asset's directory into a .pak called pakchunk111-Windows.pak.)
Next, go to Platforms → Packaging Settings:

Then adjust the settings as shown below:
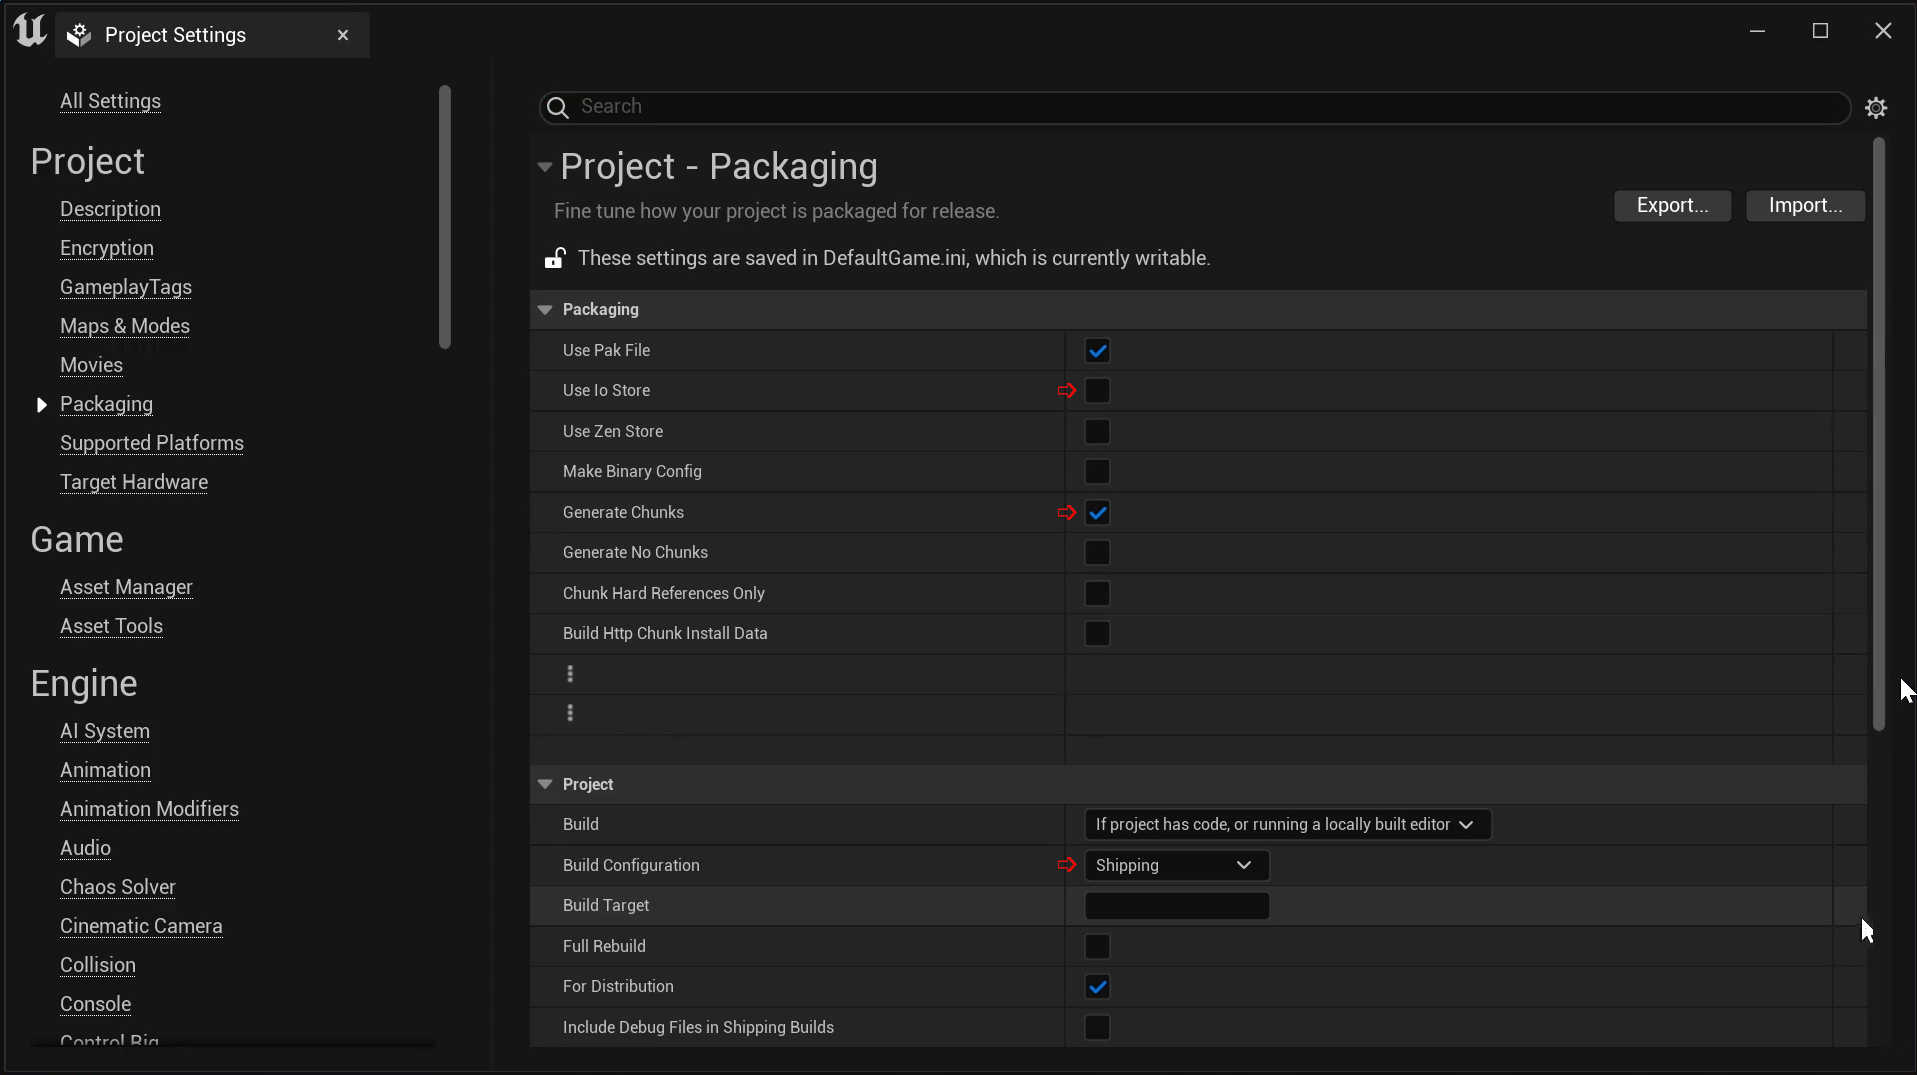
For reference, the settings should be as follows:
- Uncheck “Use Io Store”
- Check “Generate Chunks”
- Set “Build Configuration” to “Shipping”
Finally we are ready to package the project, which will produce our .pak file! Go to Platforms → Windows → Package Project and select some directory to store the output in (I've made an empty directory called DummyWildLife for this purpose):
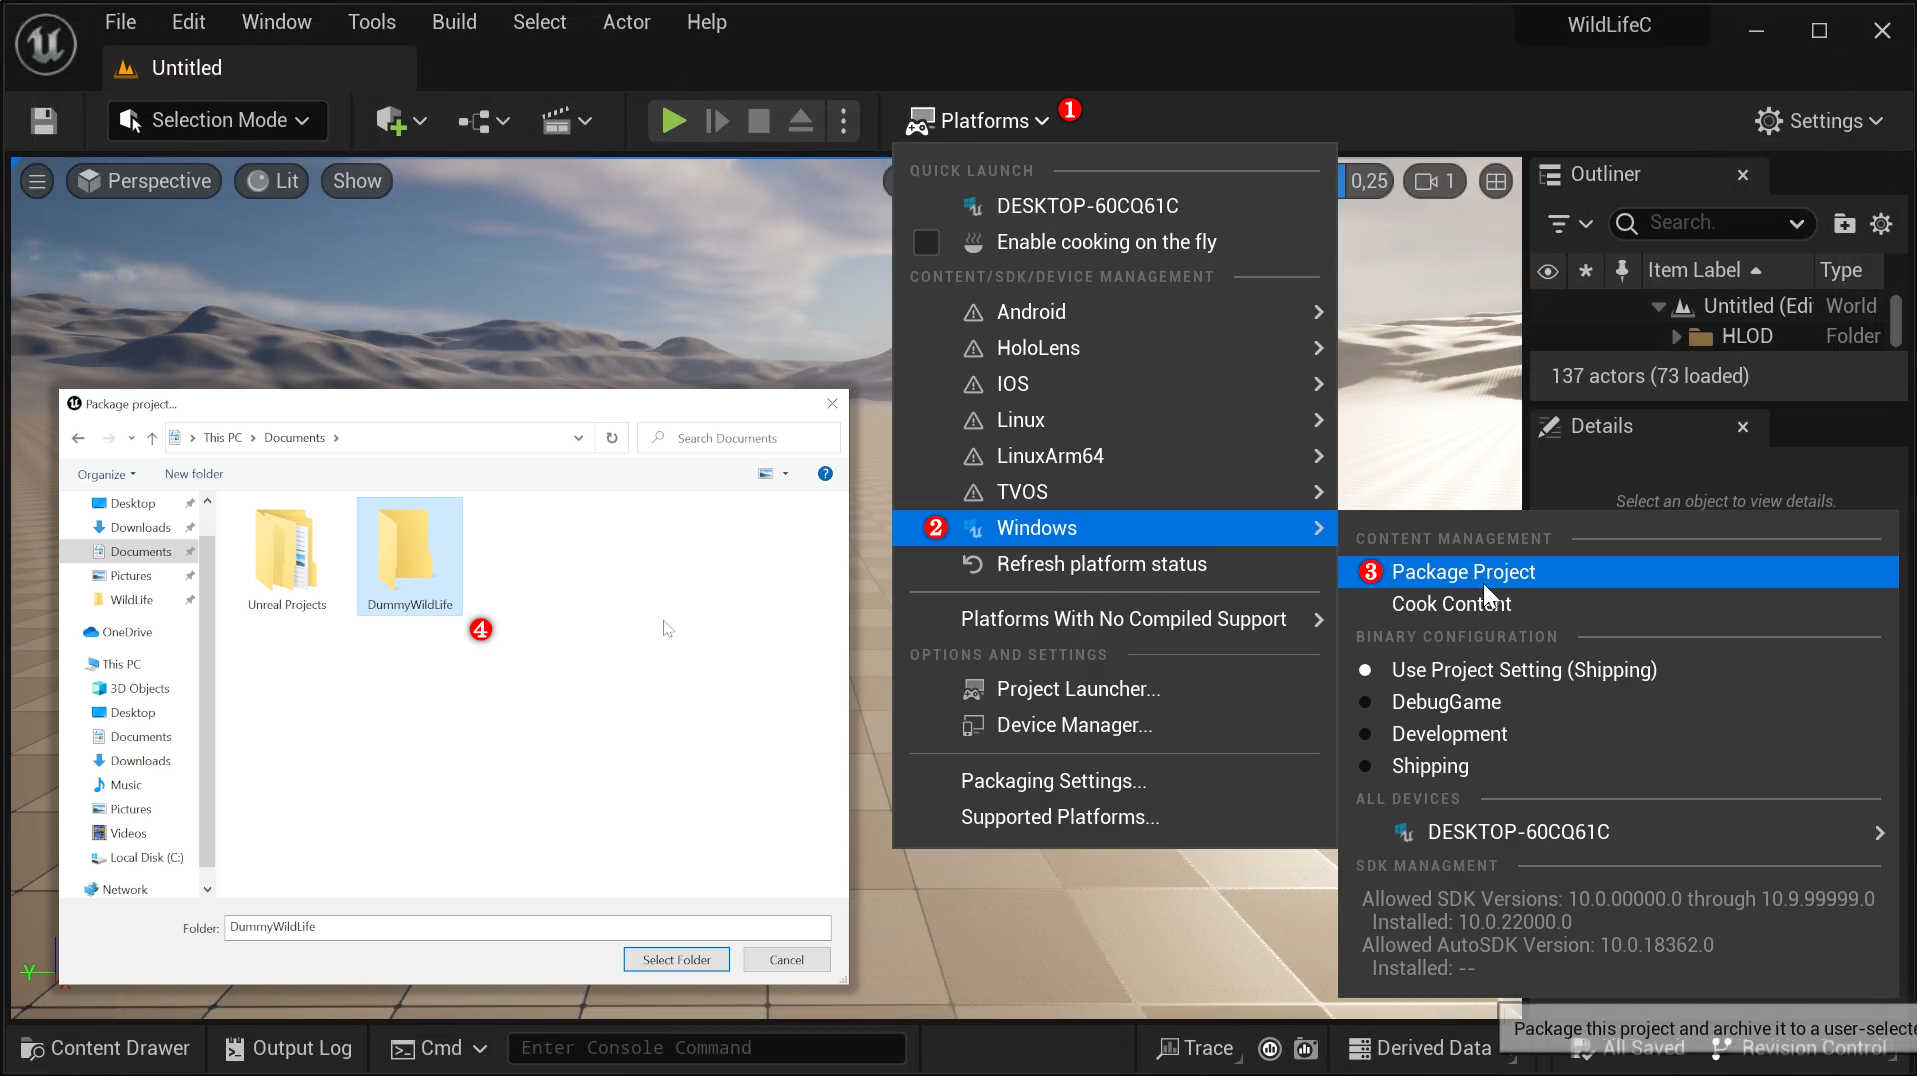
Unreal Engine will then package the project!
Note: The first time you package a project on a fresh install of Unreal Engine, it can take a long time! When I first packaged a project using a newly installed Unreal Engine 5.3.2, it took 15 minutes. But since then each packaging has completed in about 15 seconds.
When the packaging is complete, navigate to the following directory:
C:\Path\To\DummyWildLife\Windows\WildLifeC\Content\Paks(Replace the C:\Path\To\DummyWildLife part with the path to the output directory you selected.) Here you will find a .pak file called pakchunk111-Windows.pak, which contains your custom texture. Rename it to anything you like (but make sure to end the name with _P) and then copy it to your Wild Life build's Paks directory.
For example, I will rename my pakchunk111-Windows.pak file to WitchMod_P.pak and then copy it to
C:\Users\example\WildLife\2023.10.20_Shipping_Full_Build_1\Windows\WildLifeC\Content\PaksThen when I start Wild Life and choose the Witch outfit for Maya, I see my custom texture being applied: