Guide: Hex editing Wild Life assets
This guide shows how the properties of a Wild Life asset can be changed by editing the asset's raw bytes with a hex editor. It's a bit of an advanced/tedious technique, similar to editing the asset “with a needle and a steady hand”—it's easy to make mistakes. 😅
Warning: If you make a mistake during this process, the result will be a .pak file with a corrupt asset inside it, and the game will crash when trying to load it! Just remove the .pak file if that happens, and everything will be fine again. Then try to redo the process from scratch carefully. 😉
For demonstration we will edit the material mat_ilJahShoesPH, which is used for Iljah's shoes as well as for Maya's bikini. We will change its color to orange and set its roughness to 0 so that it will look like this:

The process has 3 overall steps:
- Use FModel to extract the material files (a .uasset file together with a .uexp file).
- Use a hex editor to edit the material data, which is stored in the .uexp file.
- Pack the .uexp file into a .pak using repak.
Steps 1 and 3 are the same as in the texture replacement guide. Knowledge of that guide is assumed.
Before we begin
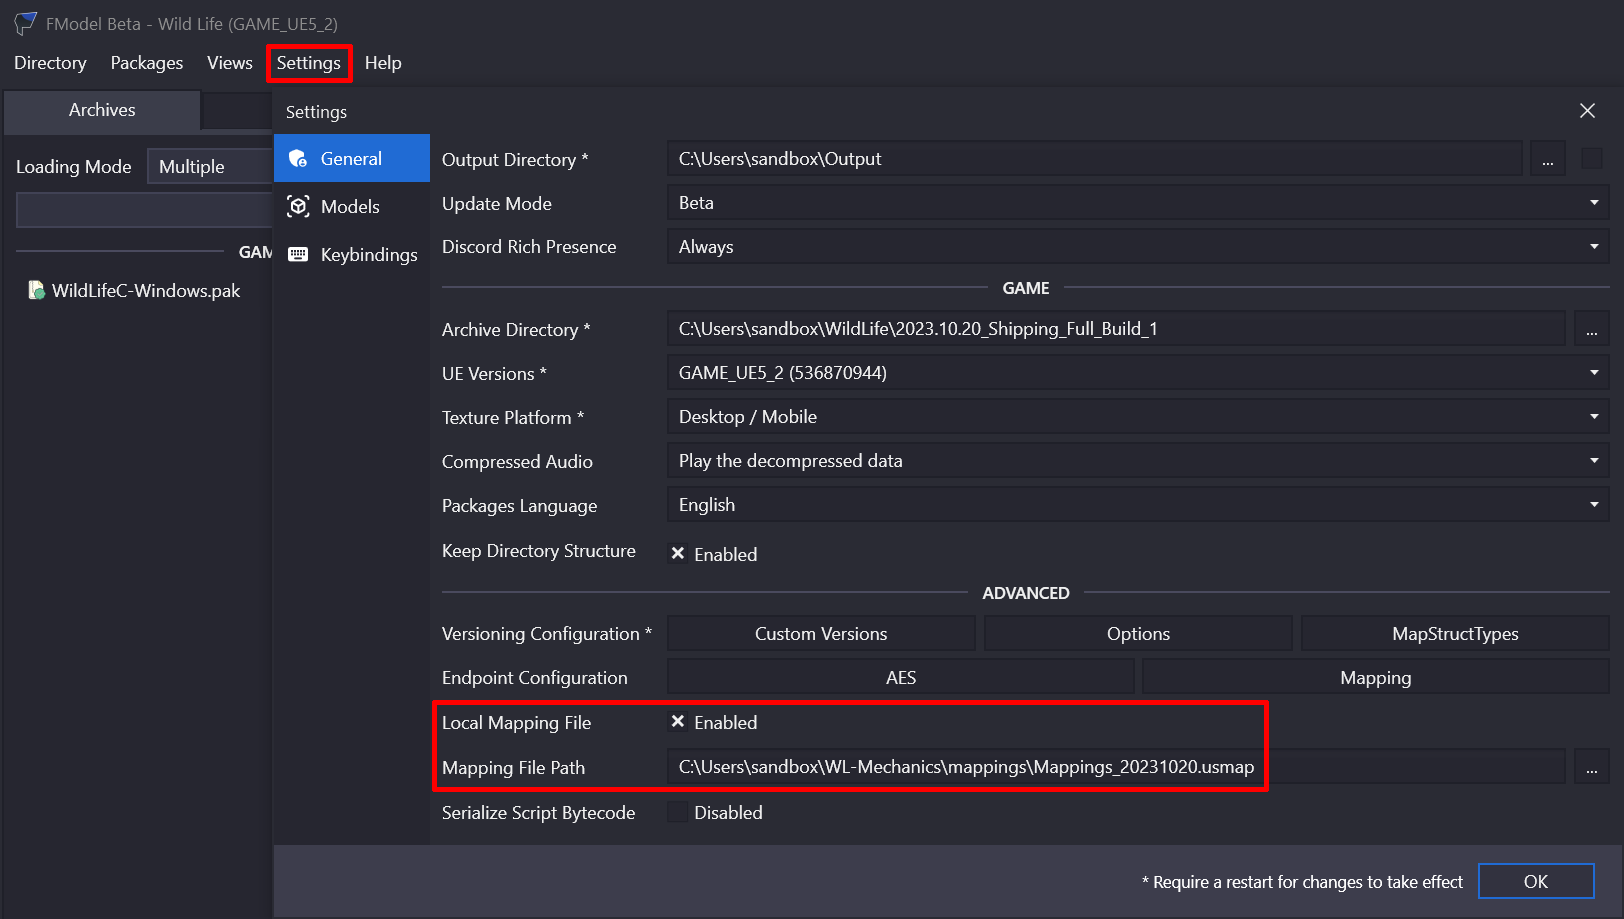
Make sure that you have configured FModel to use the a valid mapping file (.usmap) for your Wild Life build:
- Mapping files are available here.
- The image below shows how to configure FModel to use a specific mapping file.
Step 1: Extract material files
Open FModel and double-click on the WildLifeC-Windows.pak archive. Then go to Packages → Search, type in mat_ilJahShoesPH and hit ENTER. There should be a single search result; right-click on it and choose “Extract Raw Data (.uasset)”. Then right-click on it again and choose “Save Properties (.json)”. Close the search window and then click on one of the underlined file names in the information panel of FModel:
[INF] Mappings pulled from 'Mappings_20231020.usmap'
[INF] 68 virtual paths loaded
[INF] 2815 localized resources loaded for 'English'
[INF] Successfully exported mat_ilJahShoesPH.uasset
[INF] Successfully saved mat_ilJahShoesPH.json
This should bring up the directory that the files have been extracted to. It should contain (at least) 3 files:
mat_ilJahShoesPH.uassetandmat_ilJahShoesPH.uexp– these make up the materialmat_ilJahShoesPH.json– this is a kind of “summary” of the material that humans can read (but the game can't, unfortunately)
As far as I understand:
- The .uasset file contains declarations/definitions stating which properties the material has and where their values are located in the .uexp file.
- The .uexp file contains the property values themselves.
For example, the .uasset file states that the material has a property called 04. Texture Color Variation, and the value of that property is stored in the .uexp file. So the plan is:
- Use the human-readable .json file to discover the color and roughness values
- Replace those values in the .uexp file with our chosen values
We will just be doing a naive “search and replace” on the values. This can corrupt the .uexp files if there happens to be other data in the file with the same values as the ones we're replacing. That won't be the case for this example, but it might be the case for other material files.
Step 2: Prepare directory structure
Before we do the “search and replace”, let's create the right directory structure, as shown below:
📁 Documents
├─ repak.exe
└─ 📁 MayaBikiniMod_P
   └─ 📁 WildLifeC
      └─ 📁 Content
         └─ 📁 Materials
            └─ 📁 Instance
               └─ ⭐ mat_ilJahShoesPH.uexp
For simplicity, the guide places the MayaBikiniMod_P directory in the Documents directory, but it can actually be placed anywhere you like (and called anything you like, as long as it ends with _P to ensure that it takes precedence over the built-in WL files).
Inside the MayaBikiniMod_P directory we create a directory structure that exactly matches the one leading to the directory from the previous step. We then copy the mat_ilJahShoesPH.uexp file from the previous step into the innermost directory, as the diagram above shows. Now we're ready to edit this file!
Step 3: Edit .uexp file
For this step you will need a hex editor. This guide will use HxD, which is good and free. If you have another preferred hex editor, you can use that one instead.
Now do the following:
- Open the .uexp file (marked with ⭐ above) in your hex editor.
- Open the .json file from Step 1 in a text editor (e.g. Notepad).
- Put the two programs side-by-side.
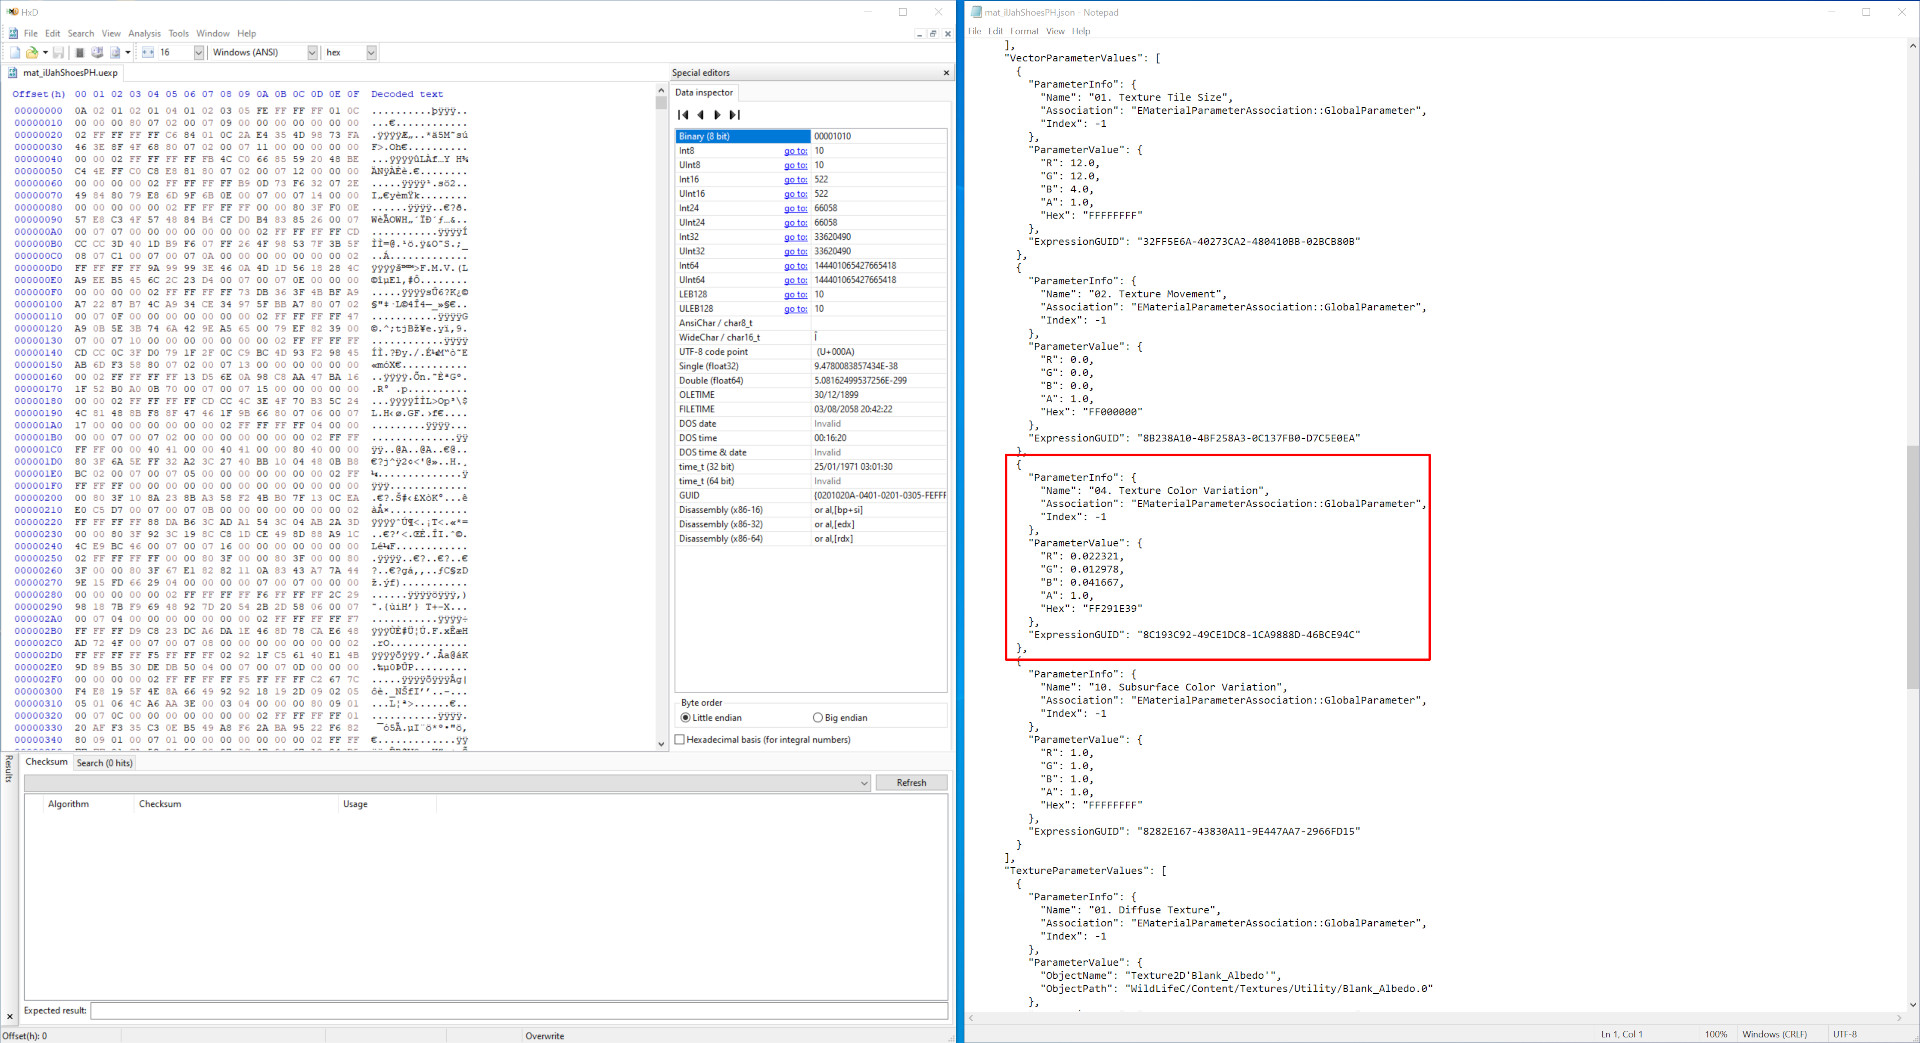
In the .json file: Scroll down until you find the parameter with the name 04. Texture Color Variation. This is the parameter that determines the color, and we will need to note its RGB values:
{
  "ParameterInfo": {
    "Name": "04. Texture Color Variation",
    "Association": "EMaterialParameterAssociation::GlobalParameter",
    "Index": -1
  },
  "ParameterValue": {
    "R": 0.022321,
    "G": 0.012978,
    "B": 0.041667,
    "A": 1.0,
    "Hex": "FF291E39"
  },
  "ExpressionGUID": "8C193C92-49CE1DC8-1CA9888D-46BCE94C"
}
We will be replacing the RGB values with ones corresponding to an orange color:
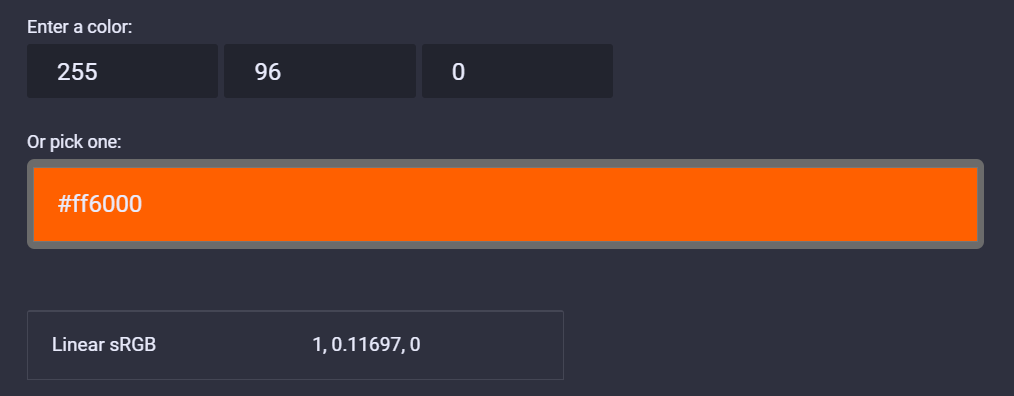
Apparently UE uses something called “linear sRGB” for colors, so we need to use that for our color. We can use a converter like this one to discover that our chosen #ff6000 color has R=1, G=0.11697 and B=0 when expressed in linear sRGB format.
Now in the hex editor: Bring up the “replace” feature (CTRL+R in HxD) and use it to replace each of the original RGB values with the ones from our chosen color. In HxD we need to use the “replace” feature three times to do this (make sure to use the “floating point number” setting):

Tip: HxD highlights changed bytes with a red color (it doesn't indicate an error).
Now we have completed the color change. We can use the same procedure to change the material's roughness:
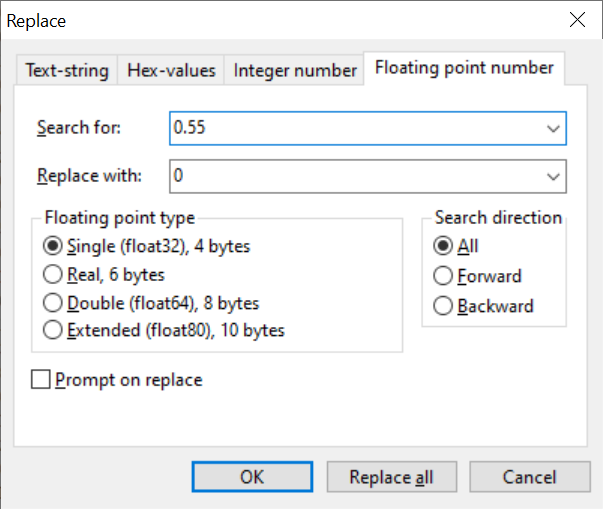
In the .json file: Find the parameter with the name 07. Roughness and note its value:
{
  "ParameterInfo": {
    "Name": "07. Roughness",
    "Association": "EMaterialParameterAssociation::GlobalParameter",
    "Index": -1
  },
  "ParameterValue": 0.55,
  "ExpressionGUID": "2F1F79D0-4DBCC90C-4598F293-58F36DAB"
}
In the hex editor: Use the “replace” feature to replace the roughness value with 0:
You see how this could easily go wrong as 0.55 might be a very common value in the file. But in this file it turns out there's only one occurrence of 0.55 (lucky for us). (You can use the hex editor's search feature to check how many times a certain value occurs in the file.)
Finally, save your changes in the hex editor (CTRL+S in HxD). 🥳
Tip: By default, HxD will create a backup of the original file when saving. Here it will be called mat_ilJahShoesPH.uexp.bak. You can reduce the filesize of your mod by removing this file, but otherwise there should be no harm in leaving it be (the game will just ignore it).
Step 4: Create .pak file
The final packaging step is exactly the same as in the texture guide. In the Windows Explorer: Go to the folder containing MayaBikiniMod_P, choose File → Open Windows PowerShell, type in the following in the PowerShell window and hit ENTER:
.\repak pack MayaBikiniMod_PThis should create a file, called MayaBikiniMod_P.pak, that contains your modified .uexp file. You can copy this file to your build's Paks directory to install it.